If your website isn’t loading over HTTPS, you’re giving search engines an easy excuse for lowering your rankings. For most website admins, this is simple to solve by installing a free Let’s Encrypt SSL certificate through their hosting provider. However for those hosting a WordPress website on a budget, you can fall into the trap of paying over the odds for your hosting provider to install an SSL Certificate for you. For those of us on a shoestring budget, the SSL Zen plugin helps you get a free SSL certificate for WordPress.
This video tutorial will walk you through using the free ssl plugin from start to finish. If you prefer written instructions, read my three simple steps below.
The GoDaddy SSL problem
Different hosting providers will offer varying solutions for installing SSL on your website. If you’re using a premium hosting package, your server support team will more than likely do this for you for no extra charge. They will often install a Let’s Encrypt certificate, which is free to generate and install.
If you’re on a less than premium package, hosting providers tend to charge for this. Considering the cost of the Let’s Encrypt certificate is zero and it takes minutes to install, it can seem a bit rich of GoDaddy to offer these kinds of prices;

Fortunately for those with a WordPress website and full access to their server’s CPanel, the free SSL Zen plugin can help you install a certificate for free. There is a premium option where the SSL Zen plugin will automatically renew your certificate for a small yearly charge. However for those prepared to renew their SSL certificate manually every 90 days, SSL Zen can get your site onto HTTPS for free.
Set up free SSL certificate for WordPress with SSL Zen plugin
Before you begin, take care of the basics;
- Sign into your WordPress dashboard and install the SSL Zen plugin
- Sign into your CPanel and keep your CPanel login on hand
Step one: Site details
The plugin will initially show a ‘Select Plan’ screen where you can opt to use the premium version of the plugin. To use the plugin for free, select the free plan.
The plugin will prompt you to provide site details, you will need to provide:
- Your website’s domain (this should be filled in automatically)
- Enable the ‘www’ prefix
- Provide an email address
- Enter your CPanel username and password and accept the terms
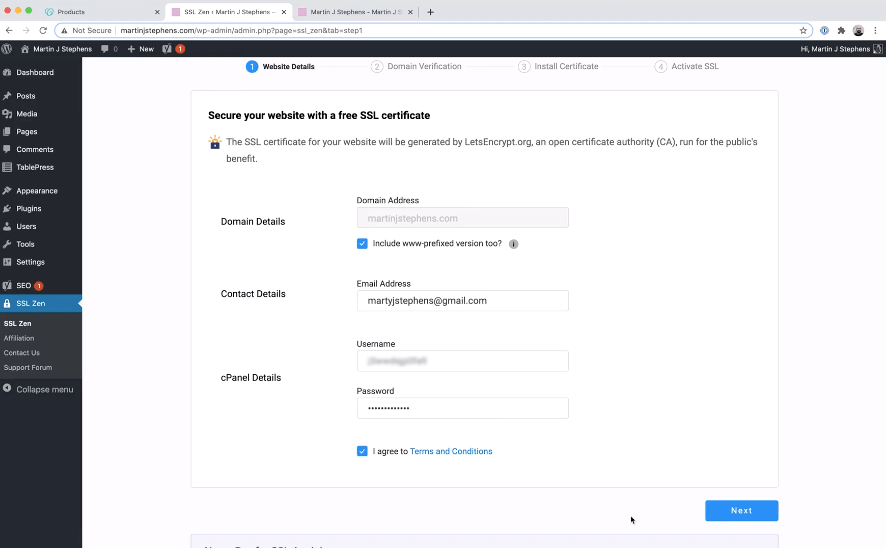
When you click next, the screen will load for several seconds. The free ssl plugin is automatically verifying your site and generating the Let’s Encrypt SSL certificate, so allow plenty of time for this to complete.
Step two: Install your SSL certificate
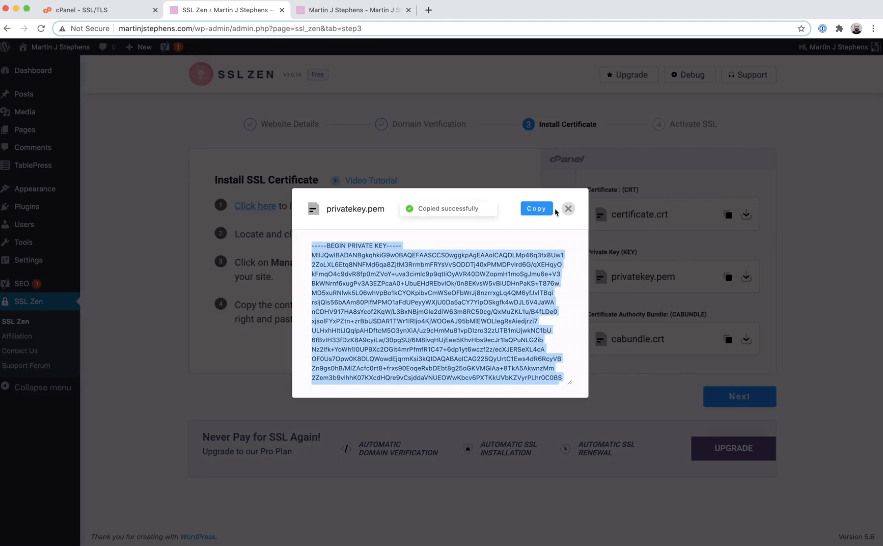
The plugin will reload to a new screen providing the three plain text files that make up the certificate. You can download these files, but it is quicker to open your CPanel in a new browser tab and paste them straight in.

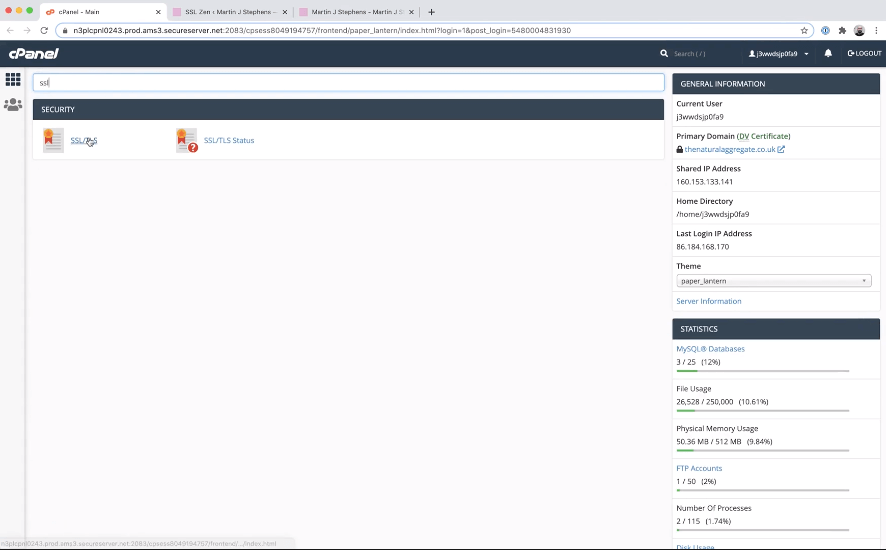
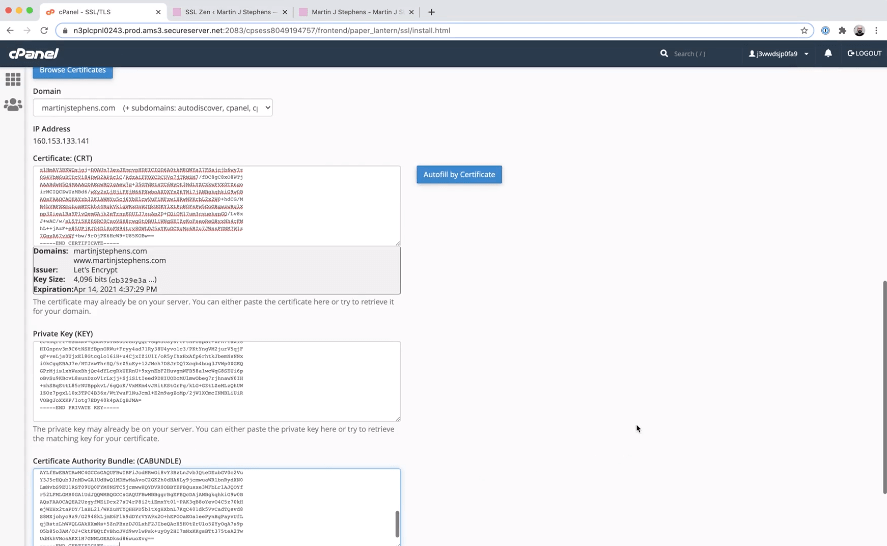
In your CPanel, locate the SSL/TLS section.You can search for CPanel options by title at the top.
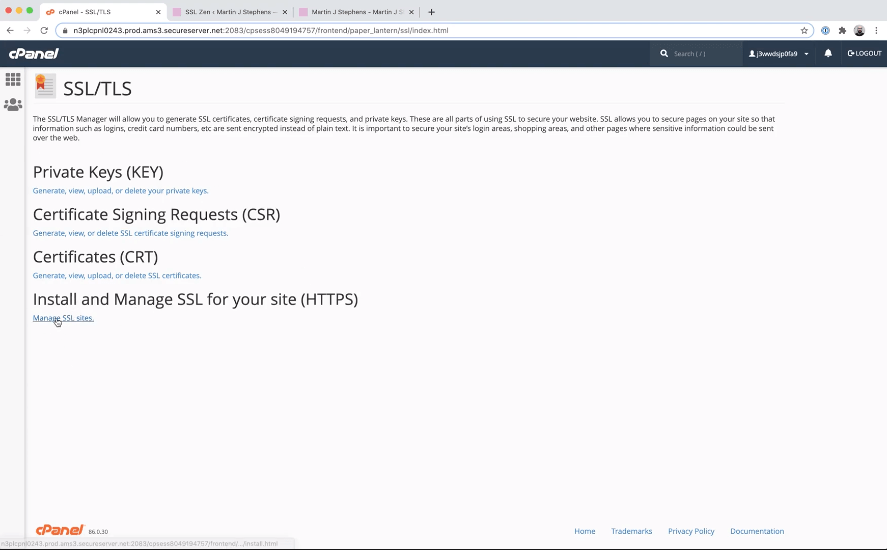
Within SSL/TLS, select Manage SSL Sites. It will probably be the last option in the list.
Select the domain you are installing the SSL Certificate for from the dropdown list. This must match the domain of the site you have installed the plugin on exactly.
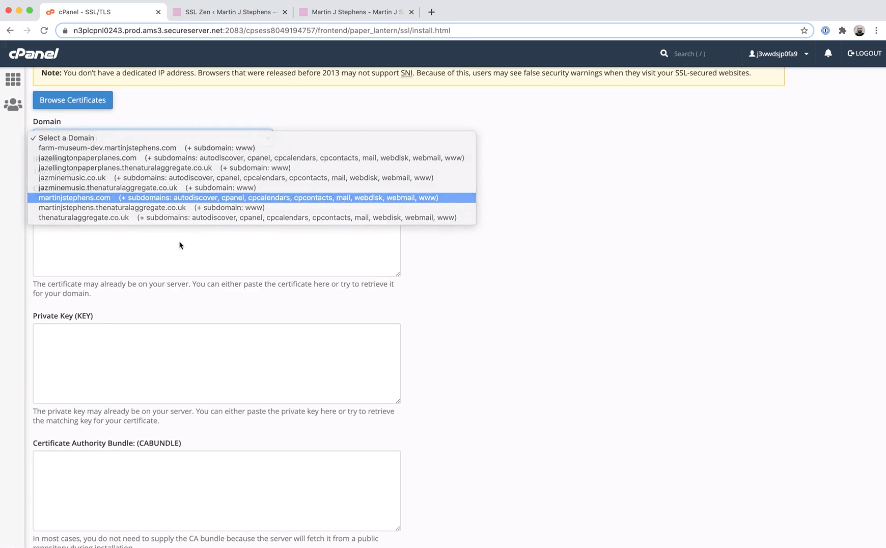
The plugin provides a copy option for each of the three text files; the certificate, private key and authority bundle.
Back in CPanel, you should see a corresponding field for each of these three files. Ensure you are pasting the correct file contents into the matching field. Once you have added all three fields, select the blue Install Certificate button.
In just a moment, CPanel will show you a pop-up which says the certificate was installed successfully.

Step three: Force HTTPS
SSL Zen goes the extra mile and not only generates the certificate but also makes changes to your site to automatically force HTTPS. The plugin uses the term ‘activate’ rather than ‘force’. Back in the plugin, go to the next screen, Activate SSL;
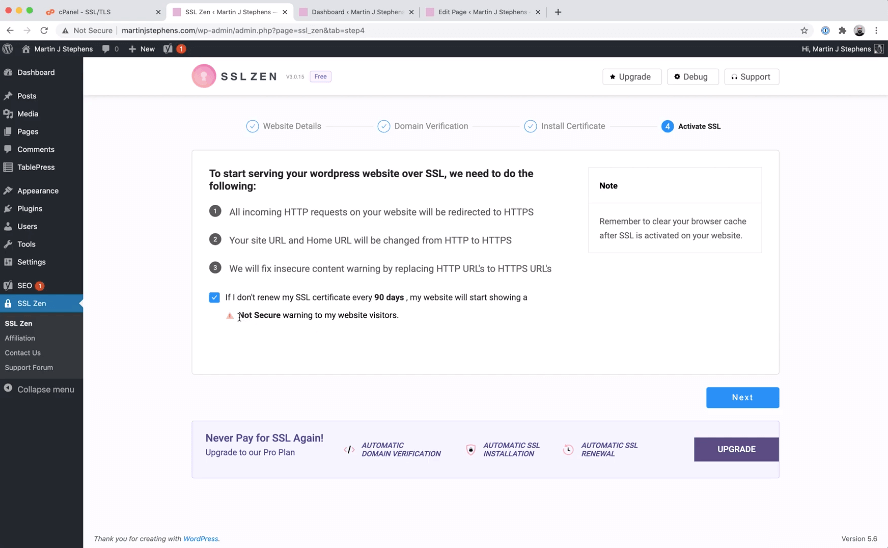
The plugin is going to automatically do the following;
- Add a 301 redirect for all traffic trying to load your site over http in a .htaccess file on the server. Without this, users and search engines can view either http or https versions of your site freely, which is not good for users or your SEO
- Rewrite your database URLs so that they are prefixed with https instead of http. This means all your permalinks will be updated
- The two steps above effectively resolve the ‘Not Secure’ message in browsers as users will be redirected to https versions of your pages and the permalinks you share will already have the https prefix
The free ssl plugin will also require you to accept that you’ll be liable for renewing the certificate manually after 90 days. If you don’t do this, users will see a privacy warning in your browser when they try to visit the website.
After you click next, you’ll be sent to your WordPress login screen. The reason for this is that you were signed in on the http version of your site. Switching over to https invalidates your WordPress session, so sign in again.

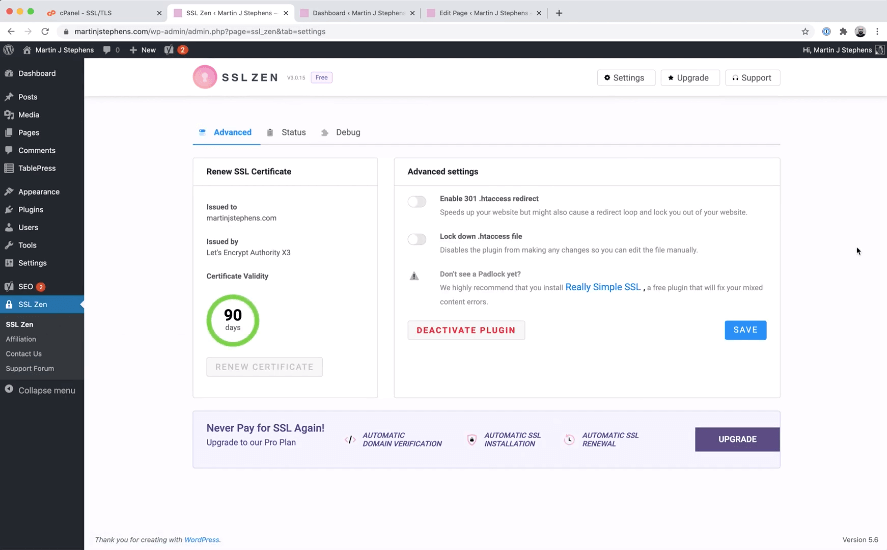
When you sign in, you’ll come through to the SSL Zen dashboard. It shows you how many days are remaining on your SSL Certificate before you must renew. There are also some advanced options should you require them.
You can put your newly activate SSL to the test in two ways;
- Attempt visiting a page on your site over http – you should see that you’re redirected to the https version of the page
- View the permalink of a page or post in your CMS – the permalink will be prefixed with https
I hope you enjoyed this tutorial. If so, please see my blog for more tutorials.